key points
Ever wonder why some home grows produce incredible, frosty buds while others… don’t? The secret isn’t magic—it’s biology. Your cannabis plants are basically green chemical factories, and when you understand how they work, you can coax them into producing some seriously impressive results. Knowledge is a key factor in achieving great results as a home grower, so taking the time to learn and understand the basics will pay off.
Whether you’re growing weed for personal use or just geeking out over plant science, this guide cuts through the noise and gives you what actually works. No bro-science, no myths—just the biological facts that separate amazing harvests from disappointing ones. The whole process of growing cannabis is straightforward when you understand the basics.
Many factors can influence your results, but understanding the biology helps you manage them.
Understanding Cannabis Biology: It’s Alive!
Here’s the thing about cannabis plants: they’re constantly reading their environment and responding. Too hot? They stress out. Perfect light cycle? They thrive. Think of growing THCa flower like being a plant whisperer—once you learn their language, everything clicks.
Growing cannabis, like THCa Flower, is much like traditional gardening; many of the same principles and techniques used for vegetables or flowers apply here as well.
The most common questions new growers ask usually boil down to: “Why is my plant doing that?” And the answer is almost always in the biology. Cannabis responds to light, temperature, water, and nutrients through complex internal signals. Monitoring pH levels is also crucial for optimal nutrient uptake and overall plant health. Master these basics, and you’re 90% of the way to a successful grow.
Preparing the Grow Space—Setting the Stage for Success
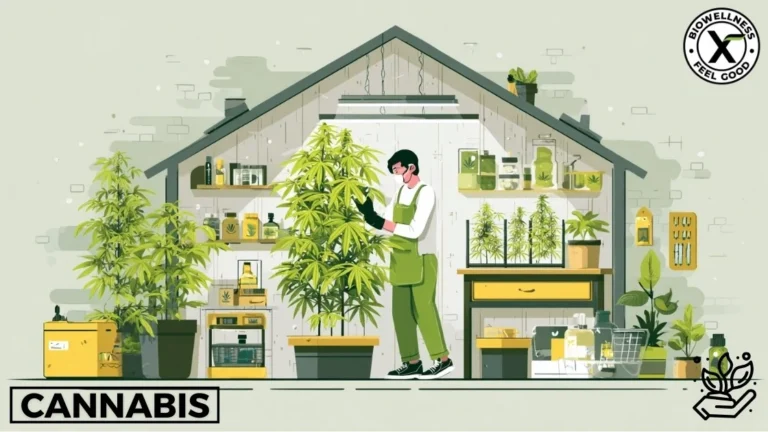
Before you even think about planting seeds, setting up your grow space—or grow room—is the first step to growing cannabis like a pro. Optimizing your grow room setup is crucial for success. Think of this as building the foundation for everything your cannabis plants will need throughout the grow cycle. A well-prepared space means fewer headaches and healthier plants down the line.
Start by making sure your grow area is spotless—clean, dry, and totally free from pests. For indoor growing, this means wiping down surfaces, vacuuming up dust, and double-checking for any sneaky bugs that could hitch a ride on your plants. Good airflow is essential, so set up oscillating fans to keep the air moving and prevent stagnant pockets where mold or pests could thrive.
Install your grow lights before you bring in any plants. Consistent, reliable lighting is key for strong plant growth, and you want to make sure your setup delivers even coverage across your entire crop. Keep an eye on temperature—cannabis likes it in the 70-85°F range during the day. Too hot or too cold, and your plants will let you know.
Don’t forget about ventilation. A solid exhaust system will pull out excess heat and humidity, keeping your environment stable and helping your plants breathe easy. This also helps prevent the buildup of moisture that can attract pests or cause mold.
Finally, make sure your grow space is secure and private. Not only does this help you comply with local regulations, but it also keeps your crop safe from prying eyes and potential thieves. By taking the time to create an ideal environment before you start growing, you’re setting your cannabis plants up for a successful, stress-free grow cycle.

Tip 1: Light Is Everything—Master Your Plant’s Internal Clock
Light doesn’t just feed your plants—it tells them when to grow big and when to make buds. This is huge.
Vegetative state: Keep lights on 18-20 hours daily. This early growth phase is when your cannabis plant develops leaves, stems, and roots, building a strong foundation for future yields. Your plant thinks it’s summer and focuses all its energy on getting huge—building branches, roots, and leaves. This is when one plant establishes the foundation for a monster harvest later.
Flowering stage: To initiate flowering, switch to exactly 12 hours light, 12 hours darkness. This change in the light cycle triggers your THCa flower plant to enter the flower stage, where it focuses on producing buds. During the flower stage, careful attention to lighting and environmental conditions is crucial for optimal bud development. This tells your cannabis plant, “Hey, autumn’s coming—time to make babies!” Except instead of seeds, you get those resinous buds packed with THCA and other cannabinoids that make quality weed what it is.
Pro tip: Consistency is everything. Light leaks during the dark period confuse your plants—like someone turning on lights randomly while you’re trying to sleep. Use timers and lightproof your grow space.
Shortcut option: Autoflowering strains don’t care about light schedules. They flower based on age (usually 3-4 weeks after sprouting). Perfect for beginners who want to avoid the whole photoperiod thing.
Tip 2: Indoor vs. Outdoor—Pick Your Adventure
Growing indoors? You’re in complete control. Grow tents give you a dedicated space where you manage temperature, humidity, and light with grow lights. It’s surprisingly easy to grow cannabis indoors with the right setup, even for beginners. Year-round harvests, no weather surprises, and you can dial in conditions for maximum THCA production. Companies like BioWellnessX know that premium cannabinoid profiles start with controlled environments—there’s a reason professional cultivators grow indoors.
Yeah, you’ll need equipment and your electricity bill might tick up, but the consistency is worth it.
Growing outdoors? Free sunlight, massive plants, and that sun-grown flavor profile many growers swear by. Cannabis loves direct sun—6-8 hours minimum. Just know you’re at nature’s mercy with weather, pests, and nosy neighbors. Outdoor growers can also take advantage of natural rain, which provides essential moisture and can reduce the need for manual watering. Local climate plays a major role in determining the success of outdoor cannabis cultivation, so choosing the right climate for your grow is crucial.
One outdoor plant can yield several pounds if conditions are right. But you get one shot per year (unless you’re in a tropical zone), so mistakes hurt more.
Legal stuff: Don’t skip this. Check your local laws before planting anything. Most places with legal growing have plant limits and visibility requirements, and there are specific regulations around how to grow THCa flower at home. Stay compliant, stay stress-free.
Tip 3: Feminized Seeds = No Drama
Here’s a biological fact that’ll save you headaches: only female plants produce the buds you want. Male plants make pollen and zero smokable flower. Worse, if males pollinate your females, you get seedy, weak buds instead of the dense, resinous flowers you’re after.
Feminized seeds are bred to produce 99%+ female plants. No more playing “guess the gender” and tossing half your crop. For beginners growing one plant or small-scale growers with limited space, feminized seeds basically double your output. However, even feminized seeds can occasionally produce hermaphrodite plants, which may pollinate your crop and reduce bud quality, so keep an eye out during flowering.
Start from seed, watch the whole journey from germination to harvest, and enjoy knowing every plant is going to produce buds. To get started, your seeds should be planted in your chosen soil or growing medium, ensuring proper conditions for healthy germination and growth.
Germination and Seedling Stage—Starting Strong
Every great cannabis harvest starts with a single seed—and how you handle those first days can make or break your entire grow. The germination and seedling stage is where your cannabis plants lay the groundwork for healthy, vigorous growth.
Germination is all about waking up your seeds. Give them a little water, a warm spot (around 70-80°F), and a bit of patience. Most seeds pop within 1-5 days, sending out a taproot that will anchor the plant for the rest of its life. You can use the classic paper towel method or plant seeds directly into moist potting soil—just make sure the environment stays humid and cozy. Using a humidity dome during germination and early seedling growth is an effective way to maintain optimal humidity levels for your seedlings.
Once your seedling emerges, it’ll show off its first set of leaves (cotyledons). This is a delicate phase, so keep the light gentle but consistent—LEDs or fluorescent grow lights work great here. High humidity (60-70%) and steady warmth help your seedlings stay happy and avoid stress.
Choosing feminized seeds is a smart move for most growers. These seeds are bred to produce female plants, so you won’t waste time or space on male plants that don’t produce buds. It’s a simple way to boost your yield and make the most of your grow cycle.
Remember, seedlings are sensitive. Avoid overwatering—keep the soil moist but not soggy. With the right care, your young cannabis plants will develop strong roots and sturdy stems, setting the stage for explosive growth in the weeks to come.
Vegetative Stage—Building the Foundation
The vegetative stage is where your cannabis plants lay the groundwork for everything that comes next. During this phase, your plants focus on building a robust root system, thick stems, and lush leaves—all the essentials for supporting heavy buds later on. Think of it as the plant’s “bulking up” period before the flowering stage kicks in.
To get the most out of this stage, keep your light cycle at 18 hours on and 6 hours off. This extended daylight mimics the long days of summer, telling your cannabis plants to keep growing and producing foliage. If you’re growing indoors, LED or HPS grow lights are your best friends—they deliver the intensity your plants crave and help drive photosynthesis, just like direct sun would outdoors.
Good airflow is a must. Set up fans in your grow tent to keep fresh air moving and prevent mold from taking hold. Consistent temperature is also key—aim for that sweet spot around 70-85°F to keep your plants happy and stress-free.
When it comes to nutrients, this is the time to feed your plants a diet rich in nitrogen, along with balanced amounts of phosphorus and potassium. Specialized fertilizers for the vegetative stage make it easy to give your plants exactly what they need for explosive growth. And don’t forget about watering—keep the soil moist but not soggy to avoid root rot and other issues.
By dialing in these conditions, you’re setting your cannabis plants up for a strong, healthy transition into the flowering stage. A solid foundation now means bigger, better buds down the line.
Flowering Stage—Triggering Bud Development
The flowering stage is where the magic happens—this is when your cannabis plants produce those sticky, aromatic buds you’ve been waiting for. To initiate flowering, you’ll need to switch your light cycle to 12 hours of light and 12 hours of darkness. This change signals to your plants that it’s time to stop growing leaves and start making flowers.
Using feminized seeds is a smart move here, as it ensures you won’t waste time or space on male plants that don’t produce buds. Once you initiate flowering, keep a close eye on your environment. Good airflow is essential to prevent mold from developing in those dense buds, and maintaining a stable temperature (ideally between 65-80°F) helps your plants stay healthy and productive.
During the flowering stage, your plants’ nutrient needs shift. Switch to bloom fertilizers that are higher in phosphorus and potassium to support bud development and maximize resin production. Many growers also use bloom boosters to give their plants an extra push during this critical phase.
Training techniques like topping and low-stress training (LST) can help shape your plants and expose more bud sites to light, leading to bigger yields. Regular pruning of lower branches and leaves improves airflow and directs the plant’s energy toward producing top-quality buds.
By carefully managing the flowering stage, you’ll help your cannabis plants produce dense, potent buds with the flavors and aromas you love. This is the payoff for all your hard work—enjoy watching your plants transform!
Humidity and Ventilation—Breathing Room for Better Buds
When it comes to growing cannabis indoors, giving your plants the right “breathing room” is just as important as light and nutrients. Cannabis plants thrive in environments where humidity and airflow are carefully managed—especially during the flowering stage, when dense buds are forming and the risk of mold is at its highest.
During the early stages of plant growth, higher humidity (around 60-70%) helps young plants and seedlings develop strong roots and lush foliage. But as your cannabis plants transition into the flowering stage, it’s crucial to lower humidity to about 40-50%. This drier environment encourages your buds to develop properly and helps prevent mold from taking hold in those thick, resinous flowers.
Good ventilation is the secret weapon for healthy cannabis plants. A steady flow of fresh air not only strengthens stems and supports vigorous growth, but also keeps temperature and humidity in check. Oscillating fans and exhaust systems are essential tools for anyone growing indoors—they move stale air out and bring fresh air in, creating the ideal conditions for your plants to flourish.
Keep a close eye on your grow space, especially as your plants produce more foliage and buds during the flowering stage. Watch for signs of excess moisture, like condensation on walls or a musty smell, which can signal that mold is lurking. By dialing in your humidity and ensuring constant airflow, you’ll help your cannabis plants stay healthy, boost bud quality, and set yourself up for a successful harvest.
Remember, happy plants with plenty of fresh air and the right humidity will reward you with bigger, better buds—so don’t overlook this key part of the growing process!
Tip 4: Feed Your Plants Right—Nutrients 101
Think of potting soil as your plant’s gut. It needs to drain well (roots need oxygen!), hold moisture, and provide nutrients. Quality cannabis soil or a base medium like coco coir sets you up for success. Using fertilizers, such as organic fertilizers and root stimulators, can further promote healthy root development and vigorous plant growth.
Vegetative growth needs nitrogen. This is when THCa plants build tissue—leaves, branches, stems. Nitrogen-heavy fertilizer (like 3-1-2 ratio) keeps growth vigorous.
Flowering stage needs phosphorus and potassium. This is when buds develop. Switch to bloom nutrients (like 1-3-2 ratio) to support flower formation and resin production—the stuff that makes quality weed. Calcium is also essential for strong cell walls and healthy plant growth, so make sure your nutrient mix includes it.
Don’t overwater. Seriously, this kills more plants than anything else. Let the top layer of soil dry out between waterings. Roots need oxygen, and soggy soil creates mold and root rot. When you just water (no nutrients) occasionally, you flush out salt buildup and keep things healthy.
Pot size matters. Start seedlings small (1-2 gallon pots), then transplant to bigger containers (5-10 gallons) as they grow. Cramped roots = stunted plants.
Tip 5: Dial In Your Environment
Temperature: Keep it 70-85°F when lights are on, 58-70°F when they’re off. Too hot and your cannabis plants stress out. Too cold and growth slows to a crawl.
Humidity: 60-70% during veg, drop to 40-50% during flowering. High humidity during flowering = mold risk in dense buds. Nobody wants moldy weed. Even while storing your flower, these conditions play a huge role.
Airflow: Moving air strengthens stems (wind resistance makes them thicker), prevents mold, and keeps CO2 fresh around leaves. Use oscillating fans—gentle circulation, not a wind tunnel.
Good environmental control is what separates decent grows from exceptional ones. This is where indoor growing really shines—you create the perfect conditions instead of hoping Mother Nature cooperates. Like other flowering plants, cannabis requires careful environmental management during the flowering stage to achieve the best results.
Tip 6: Read Your Plants Like a Book
Cannabis plants talk to you through their appearance:
- Yellow lower leaves? Probably nitrogen deficiency
- Crispy brown leaf tips? Nutrient burn or heat stress
- Droopy plants? Either too much or too little water
- Slow growth? Check temperature, light intensity, and pH
- Interveinal yellowing (yellowing between leaf veins)? Often a sign of magnesium deficiency
- White powdery stuff? Mold—increase airflow and drop humidity ASAP
Generally, cannabis doesn’t need much maintenance beyond regular watering and monitoring. Just pay attention to these signs and basic care.
During the flowering stage, watch those buds swell and trichomes (tiny resin glands) develop. This is when stress really impacts quality, so keep conditions stable.
The smell intensifies as flowering progresses—those terpenes developing are part of what makes each strain unique. Strong, pleasant aroma = healthy plant doing its thing.
Optimizing Yields—Science-Backed Strategies for Bigger Buds
If you want to take your harvest to the next level, optimizing yields is all about combining smart science with hands-on care. The most important factor? Light. The more quality light your cannabis plants receive, the more energy they have for robust plant growth and bud production. LED grow lights are a top choice—they’re energy-efficient, run cool, and deliver the full spectrum your plants need.
Temperature and humidity matter, too. Keep your grow room in the ideal range to prevent stress and encourage healthy growth. Too much heat or humidity can slow your plants down or even cause problems like mold, while the right balance helps your buds reach their full potential.
Nutrient management is another key to maximizing yields. Monitor your plants closely and adjust your fertilizer regimen as needed—healthy, well-fed plants produce bigger, denser buds. Some advanced growers also supplement with CO2 to boost photosynthesis and growth, especially in sealed grow rooms.
Don’t forget about training techniques. Pruning, topping, and low-stress training (LST) can all help your plants direct more energy to bud sites, resulting in larger, more uniform colas. Regularly check your plants for signs of stress and address any issues quickly to keep growth on track.
By combining these science-backed strategies—optimal lighting, precise environmental control, smart feeding, and effective training—you’ll set yourself up for a happy growing experience and a harvest full of big, beautiful buds. Keep learning, keep experimenting, and watch your yields climb with every grow!
Pest Control and Prevention—Keeping Your Crop Safe
Nothing ruins a grow faster than a pest invasion. When you’re growing cannabis, keeping your plants safe from bugs is just as important as watering or feeding them. Pests like spider mites, aphids, and whiteflies can show up out of nowhere and wreak havoc on your crop if you’re not prepared.
The best defense is a clean, well-maintained grow space. Good airflow is your friend—moving air makes it harder for pests to settle in and helps prevent mold. Regularly inspect your plants, especially the undersides of leaves, for any signs of trouble. Early detection is key to stopping pests before they spread.
Healthy plants are naturally more resistant to pests, so stick to a regular watering and feeding schedule. Don’t let your plants get stressed or weak—strong, vigorous growth is your best armor. If you do spot pests, act fast. Organic options like neem oil or insecticidal soap can knock back infestations without harming your plants or the environment. Another effective organic method is introducing beneficial insects, such as ladybugs or predatory mites, to help control pest populations naturally.
Always quarantine new plants or equipment before bringing them into your main grow area. This simple step can prevent a lot of headaches down the road. By staying vigilant and proactive, you’ll keep your cannabis crop safe, healthy, and on track for a bountiful harvest. Regular monitoring and quick action are the secrets to a pest-free, successful grow.
Tip 7: Harvest and Cure for Maximum Quality
When to harvest: Use a magnifying loupe to check trichomes. When they’re mostly cloudy with some amber (10-30%), you’re at peak potency. Harvest too early and cannabinoids haven’t fully developed. Too late and THC degrades.
Drying: Hang branches in a dark room at 60-70°F and 45-55% humidity for 7-14 days. Slow drying preserves terpenes and prevents harshness.
Curing: After drying, put buds in glass jars and “burp” them daily for the first week (open jars to release moisture). It’s recommended to use a hygrometer inside the jars to monitor humidity levels during curing. Continue curing 2-4 weeks minimum—longer is better. This process breaks down chlorophyll and lets flavors mature.
Proper curing transforms decent buds into premium flower. This is why BioWellnessX’s THCA products emphasize quality processing—cannabinoid profiles and terpene preservation depend on patient post-harvest care, not just what happens during the grow.
Skip the cure and you’re smoking grass clippings. Do it right and you’ve got smooth, flavorful, potent weed.
Growing Weed = Understanding Biology
Here’s the beautiful thing: growing cannabis teaches you to think in systems. Light cycles, nutrient timing, environmental control—it’s all connected. Nail the biology and your plants reward you with quality buds.
Whether you’re cultivating your own medicine or just appreciating how cannabis produces compounds like THCA, success comes from working with plant biology, not against it.
Ready to skip the learning curve? BioWellnessX specializes in premium THCA products crafted from expertly grown cannabis. While you’re perfecting your cultivation skills, explore their selection of high-quality cannabinoids—all the benefits of professional-grade growing without the months of work.
Happy growing! May your harvests be heavy and your buds be frosty.

Legal Disclaimer:
By reading this information presented, you agree to release the author of any liability that comes from using this data. This post does not constitute legal advice. Claims about cannabinoids have not yet been approved by the Food and drug administration FDA. Read the full legal disclaimer here.
Other Articles That May Interest You
- Wellness gummies with Myrcene review
- Delta-8 vs CBD, what’s the difference?
- Is Delta-8 or CBD better for pain?
- Delta-8 edibles review
- Is Delta-9 legal?
- CBD for Vertigo – Discover the Potential
- Finding the Best CBN Gummies for Sleep Support
- What Are the Best Forms of CBN Available Today?
- Delta-9 THC Gummies Review
References:
- Hemp Production and the 2018 Farm Bill – 07/25/2019 | FDA
- The Controlled Substances Act (dea.gov)
- Hemp Production and the 2018 Farm Bill – 07/25/2019 | FDA
- The Controlled Substances Act (dea.gov)
- The cannabis Terpenes
- Cannabinoids and terpenes
- Therapeutic Efficacy of Cannabidiol (CBD)
- Cannabidiol in Anxiety and Sleep
- Cannabidiol use and effectiveness
- Harvard Health on CBD
BONUS: Quick Troubleshooting Home Grower’s Guide
Your plants show symptoms when something’s wrong. Here’s how to decode them:
16.1 Yellow Leaves
Yellowing leaves are often a sign of nitrogen deficiency. If older leaves turn yellow while new growth remains green, your plant likely needs more nitrogen.
Magnesium deficiency can also cause yellowing, but it usually starts between the veins of older leaves, creating a distinct interveinal chlorosis. If supplementing nitrogen doesn’t help, check for magnesium deficiency and consider adding a magnesium supplement.
16.2 Root Rot
Symptoms: Wilting, yellowing leaves, brown or mushy roots, and a foul smell from the root zone.
Causes: Overwatering, poor drainage, or lack of oxygen in the root zone, often exacerbated by high humidity or contaminated water.
Solutions: Improve drainage, reduce watering frequency, and ensure pots have adequate holes. Use beneficial microbes or hydrogen peroxide to treat affected roots. Consider switching to a well-aerated medium like coco coir for better root health.
16.3 Calcium Deficiency
Symptoms: New growth appears twisted or distorted, with brown spots or edges on leaves. Bud development may be stunted.
Causes: Low calcium in the nutrient mix, improper pH, or using soft water.
Solutions: Add a calcium supplement (such as calcium nitrate or Cal-Mag). Ensure pH is in the optimal range (6.2–7.0 in soil, 5.5–6.5 in hydroponics). Use hard water or supplement with calcium if using reverse osmosis water.
16.4 Stunted Growth
Slow or stunted growth can result from rootbound plants, poor soil, or insufficient light. Suboptimal climate, such as temperature or humidity outside the ideal range, can also cause stunted growth. Check for pests or diseases as well.
16.5 Leaf Curling
Leaves curling up or down may indicate overwatering, underwatering, heat stress, or nutrient imbalances. Adjust watering and check environmental conditions.
16.6 Pro Diagnostic Tips
- Unexpected seeds in buds? Check for hermaphrodite plants during flowering, as they can produce pollen and cause seeds to form.
- Use a humidity dome during germination and early seedling stages to maintain optimal humidity and improve sprouting rates.
- In sealed grow rooms, supplementing with CO2 can boost growth and yields.
- Coco coir is an excellent base medium for improved drainage and root health.
- Always check pH and EC of your water and nutrient solution.
- Inspect leaves (top and bottom) for pests with a magnifying glass.
- Keep a grow journal to track changes and spot patterns.
🟡 Yellow Leaves
What’s happening: Lower leaves turning yellow
Why: Usually nitrogen deficiency—plant’s stealing nitrogen from old leaves to feed new growth. Magnesium deficiency can also cause yellowing, especially between the leaf veins, but unlike nitrogen deficiency, the veins often remain green while the areas between them turn yellow.
Fix: Add nitrogen-rich fertilizer during veg. Check pH (should be 6.0-7.0 for soil)
🔥 Burnt Leaf Tips
What’s happening: Brown, crispy edges
Why: Too much fertilizer or heat stress
Fix: Flush soil with plain water, reduce nutrients by half, check light distance
💧 Droopy Plants
What’s happening: Leaves hanging limp
Why: Water stress—either too much or too little
Fix: If soil is dry, water thoroughly. If soggy, let it dry out and improve drainage. Persistent overwatering can lead to root rot, which causes drooping and stunted growth. To check for root rot, gently remove the plant from its pot and inspect the roots—healthy roots are white and firm, while rotting roots are brown, mushy, or have a foul smell. Trim away affected roots and repot the plant in fresh, well-draining soil.
🐌 Stunted Growth
What’s happening: Plant barely growing
Why: Could be temperature, suboptimal climate (such as temperature or humidity outside the ideal range), weak lights, root-bound pot, or pH lockout
Fix: Check basics first—temp (70-85°F), adequate light, room for roots to grow
⚪ White Powder on Leaves
What’s happening: Powdery white coating
Why: Mold (powdery mildew)—stagnant air and high humidity
Fix: Increase airflow immediately, drop humidity to 40-50%, remove infected leaves
Pro Diagnostic Tips
- Check environment first — Temperature, humidity, and light cause 70% of problems. During germination and early seedling stages, use a humidity dome to maintain optimal humidity and improve seedling survival. In sealed grow rooms, supplementing with CO2 can boost photosynthesis and plant growth.
- Look at patterns — Symptoms on old leaves vs. new growth tell different stories. Watch for signs of calcium deficiency, such as distorted new growth or weak stems, and address it with a calcium supplement if needed.
- Change one thing at a time — So you know what actually worked. Consider using coco coir as a base medium for improved drainage and root health.
- Catch problems early — Easier to fix before they spread. Regularly check for hermaphrodite plants during flowering, as they can cause unexpected seeds and reduce bud quality.
Why This Matters for Quality
Here’s the thing: environmental stress doesn’t just hurt yield—it tanks your cannabinoid and terpene content. THCA production happens in those resinous trichomes, and stressed plants make fewer, lower-quality trichomes.
This is why premium products from companies like BioWellnessX emphasize cultivation quality. You can’t create exceptional THCA products from stressed, poorly grown cannabis. The biology matters from seed to consumption.
When you successfully troubleshoot and maintain healthy plants through harvest, you’re optimizing the plant’s natural ability to create valuable compounds. Those frosty, resin-covered buds aren’t just pretty—they’re packed with the cannabinoids and terpenes that make quality weed.
Keep Learning
Every grow teaches you something. Your first crop won’t be perfect—that’s normal. Watch your plants, take notes, adjust based on results. The growers with multiple successful harvests under their belt? They learned by doing, making mistakes, and figuring out what works in their specific setup.
Cannabis cultivation is part science, part art. The science gives you the framework (light cycles, nutrient ratios, ideal temps). The art comes from reading your specific plants and responding to what they need.
Now get growing—those buds won’t grow themselves!